Sunday, November 8, 2009

Chicken Tikka Masala and Stitches

Forgive me for not posting in so long. I've been quite busy (*cough* and lazy) with school. I just finished my physics and organic chemistry midterm this week, so now I just have catchup reading to do in my other classes and to get ready for finals. I've been busy, also, with club events. I just did an acting audition for Cal VSA's Spring Culture Show! Pretty excited to see if I get a spot, although I am a little anxious about how busy I will be next semester with my tentative schedule: Biology, Physics, Engineering, Undergrad research apprenticeship, Culture show choreographer and actress. Whew! Time management will be key.

Anyways...on to what this post is supposed to be about:


Chicken Tikka Masala.

Or, at least, my attempt at making it. Granted, this tastes very good, but I doubt any Indian would say it's authentic. I used what I had on hand and threw in as I saw fit. This dish also occurred around the slashing of my finger by a glass cup, the finger which proceeded to bleed for an hour before I went to the ER to get it stiched up. While it was cut, I applied paper and pressure to it while still on and off cooking this tikka masala. Such an eventful Friday night!

So, I looked up a recipe for chicken tikka masala and proceeded to add ingredients as stated, not measuring anything and crushing whole coriander and cumin seeds with the back of a wooden spoon. This was very much a "whatever's-on-hand" kind of endeavor.

I marinated cubed chicken in yogurt, lime juice, cumin, coriander, paprika, black pepper, chili powder, and ground ginger the day before. I then somewhat followed this recipe with the change in marinating the chicken.


First, I stir fried some chopped onion with ground ginger and garlic. I added cumin, coriander, curry powder, turmeric powder, paprika, and more chili powder and sauteed some more. I then added some chopped tomatoes that I blended. Simmer a bit, adjust flavors to taste. Then, I added the whole shebang of marinated chicken, with the yogurt marinade and all. Since I wouldn't be thickening the sauce with any cream or the like, I figured the yogurt would be a fine substitute. It was all right, but cooked yogurt tends to become grainy in the final product. I let this simmer until the chicken was cooked through. ^Above, I served it with brown rice - no basmati, I know :'( - and mixed field greens. Haha, soooo not Indian. Lets say it's Indian fusion or something wild like that. In all, it was pretty good. Next time, cream or whole milk would make the texture better and more curry and turmeric powder.

And finale!

Came out of the ER with a splint. Looks like I broke my finger,
but it's just 6 stitches! :P

Tuesday, October 20, 2009

A Taste of Home - Vietnamese Noodle Salad "Bun"

Being an 8 hour drive from home, I often miss the good home-coked meals that my mom makes. Especially her Vietnamese food. My mom has been the main cook and caretaker for her family since she was just a kid, and despite being one of the youngest of 11 siblings. Through all her years of hard work and experimentation, she has become a master at Vietnamese cooking. If she were asked what her specialties are, they would have to be her pho (beef noodle soup), mi hoanh tanh (wonton noodle soup), and com chien (fried rice). My relatives rush over to our house when they hear she has made mi hoanh tanh or pho. Everyone praises the hearty, delicious taste. And my mom puts hours and intense labor into her work. The wontons are individually wrapped into pockets the size of ping pong balls, then steamed till perfect. The pho soup is simmered for hours to extract the flavors of the beef bone and vegetables. The com chien components are individually sliced and chopped and added one by one to create an enticing mix. It's a Vietnamese heaven at home.


But, at UC Berkeley, despite our medley of diverse and cheap cuisines, the Vietnamese selection is decent and much more expensive than where I am from. I often have cravings for bun (noodle salad), nem nuong cuon (BBQ pork salad rolls), and other Vietnamese dishes. So, I decided to make some bun for myself!


Bun is basically a mix of cooked rice noodles with some kind of meat, a medley of fresh julienned vegetables, mixed with nuoc mam cham (fish dipping sauce), and topped with a generous serving of fresh herbs. The meat can be thin-sliced beef, tofu, chicken, egg rolls (really good!), BBQ pork, or whatever. The simple meats can be stir-fried in finely-chopped lemongrass for flavor and texture. I only had chicken and firm tofu on hand, so I simply stif-fried that with ginger powder. I made the nuoc mam cham myself, adjusting until it tasted just sweet, salty, and tangy enough. I like to put heaps of garlic and thinly-sliced carrots in the sauce. I was pretty happy with how it came out. Eating it let me remind myself of home and how happy I am for being Vietnamese! Yay food and culture!

(I don't have the exact amounts, but this a kind of dish that you throw together to your own preferences. Bell peppers aren't usually in Vietnamese dishes at all, but that's what I had on hand and it went in as a good substitute for mung bean sprouts.)


Bun Ga (Vietnamese Noodle Salad with Chicken)
1. Cook rice noodles. Drain and let cool.
2. Saute chicken breasts (cut up into small pieces), tofu (cut into small cubes), ginger powder, and 1 white onion (chopped) until cooked through.
3. Make Nuoc Mam Cham: add 2-3(???) Tbs white sugar, 3 chopped garlic cloves, and 1/2 fresh squeezed lime in a small bowl. Let flavors absorb for a while. Add a good amount of fish sauce and water until it the salt, sugar, and tangy flavors balance out. Sorry, I can't explain better. If you've tasted this before, try to go towards that. If not, you can find recipes online with exact amounts. Add thin slices of carrot. It all came out to about 1 very full cup.
4. Put noodles in bowl. Add meat and tofu and top with fresh vegetables (julienned cucumbers, mung bean sprouts, lettuce) and herbs (cilantro, Thai basil, mint, VIetnamese coriander)

Friday, September 25, 2009

French Onion Soup


As promised, here is the French Onion Soup I made at the beginning of this week.

I bought a bag of onions a couple of weeks ago, so I wanted to use the rest of it. Onions are used in basically every recipe for extra flavor, and they're chock full of good vitamins. They have the flavanoid called quercetin, which protects against cataracts, cardiovascular disease, and cancer. They also contain 20% of your daily recommended vitamin C. Flavor and taste! What better reason to eat them?

...Well, I guess the tears.

So, I was cutting just 3 medium yellow/Vidalia onions and I was crying for at least 6 hours afterward. It was rather annoying. My nose kept running and the onions left their bite on the cutting board, so when my house-mate cut peaches, it had an undertone of onions. Whoops. Ah well, the soup came out good enough.

So, I made my own vegetable stock from scraps of carrots, lettuce, zucchini, broccoli, onions, and cilantro from the past two weeks. Just threw them in a pot of water and boiled with dried basil and oregano and sea salt. I did this first, then proceeded to make my French Onion Soup.


French Onion Soup (serves 4-5)
Ingredients
1-2 Tbs butter
3 yellow/ Sweet Vidalia onions, chopped into large pieces
2 garlic cloves, crushed and chopped
3-4 or 5 cups vegetable broth (beef broth would probably taste better)
~4 Tbs or more of balsamic vinegarette to replace white wine (I'm a sophomore, I don't have access to alcohol...)
Oregano, basil, salt, and pepper to taste

Directions
1. Melt butter in stovepot. Layer in onions with sprinkles of salt. Don't pan-fry them. You want them to turn translucent and soft. Cook for some 20-30 minutes, stirring occasionally.
2. Pour in vegetable broth and garlic. Season with herbs and salt and pepper. Bring to boil, then simmer, covered for 1 hour, stirring periodically. Pour in balasmic vinegarette halfway through, maybe. Taste and adjust seasonings.
3. Once satisfactory, turn off heat, let cool a bit.

Now, you can serve it with some toasted bread with cheese melted on top! The classic way is to pour them into broiler-safe crocks, top with slices of crusty French baguette and Gruyere cheese, and broil until they look GOOOD. As you can see from my pictures, I didn't have that stuff, so I just used my Oroweat potato bread and grated parmesan cheese. Good enough. Oh, and the picture has ground turkey in it, but it's as good without as well. Enjoy this college-version of French Onion Soup!

Sunday, September 20, 2009

A lot of Things I've Made

So, I've done a lot of cooking since the last post. What with school starting and all, there's been less time to post. I took pictures of the food and planned on blogging about them, but then a day would pass and then suddenly it'd be a week since I'd made that dish! Here's a listing of what I've done in the past couple of weeks:

Sesame Fish Sticks

 
Paprika Pepper Salmon

Cilantro Pesto Pasta (with Pork Fu and Lettuce)

I've done a couple of other random things, but didn't take a picture. I also made Sauteed Vegetables and Turkey in Bechamel Sauce, and today I made French Onion Soup. It's been fun trying out new recipes and experimenting at will with whatever ingredients I have on hand. I don't really have exact measurements for any of my recipes, but here is the basic ingredients for the Salmon and Pesto. To make them is fairly quick and simple - contrary to making the fish sticks, which required deep-frying. I put them in a low-rim pan and hot oil was spraying all over me! It was not fun, and I was in a rush to take it to my friend's Disney Movie Marathon. But, people liked it, so I guess it was worth it.

Paprika Pepper Salmon:
Salmon, Paprika, Pepper, Onions, Garlic
Pan-fry in olive oil until cooked through.

Cilantro Pesto:
1/4 cup Almonds, Bunch Cilantro Leaves, 3 Garlic Cloves, Enough olive Oil to desired consistency, Salt + pepper (to taste)
Blend in a food processor.

Saturday, September 5, 2009

Vegetable Empanada


Cooking with friends is both fun and time-saving. Not only do you get a few extra hands in the kitchen, but you get enjoyable company that gets to taste the delicious product when the cooking's all done! This is what I finally got to do two weeks before going back to school. I invited five of my friends over to have a cooking/ice cream/crafts party. I said I'd make them vegetable empanadas for lunch, and then we'd make chocolate gelato, and then we'd crochet or do whatever else they wanted to do at my house. I always wanted to make empanadas (it's not just because I went to that Tapas place earlier!), and finding a baked version peaked my interest.


I didn't have any of the Mexican spices on hand, so I sub'd in a good amount of tabasco sauce. I also used whole wheat flour because I was low on normal white flour. I also made some other tweaks, which you'll find in the recipe below. One of my friends who came over was really helpful with the preparation. She helped make and roll out the dough. When she asked for a rolling pin, I gave her a wine bottle wrapped in a cookie sheet because I didn't have one. She laughed at my paucity of baking tools, but I was laughing too. I'm used to it. ;P

Baked Whole Wheat Vegetable Empanadas (adapted from here) Serves 8
Ingredients
3 carrots, chopped (I recommend using less. The carrot flavor overtook the empanadas)
2 medium zucchini, chopped
1 large onion, chopped
1/2 - 2/3 can of whole sweet kernel corn (low sodium, preferred)
3 medium tomatoes, chopped
3 minced garlic cloves
4 Tbs (?) Tabasco sauce
2 tsp (?) sea salt
2 Tbs flour mixed with 1/4 cold water
1 cup (?) shredded Mexican cheese
3-1/2 cups whole wheat flour
1-1/2 Tbs baking powder
8 Tbs chilled butter
2 tsp soy sauce
1-1/4 cups ice cold water
1 egg mixed with 1 Tbs water

Directions

1. Boil carrots over medium heat until tender.
2. Mix tomatoes with Tabasco sauce and salt. Blend in the 2 Tbs flour-water mixture.
3. Saute onions, then add zuchinni and saute, then add garlic and saute, then add corn. Stir in tomato mixture, bring to a simmer. Cover and simmer 3 minutes; uncover and constantly stir until sauce is thickened.
4. Stir in carrots and cheese. You can add more salt, cheese, and/or Tabasco sauce to taste.
5. Remove from heat, cover, and refrigerate.
6. Preheat oven to 400°F. For empanada crust, combine 3-1/2 cups flour and baking soda. Cut in butter and mix into a coarse meal. Make a well in the center.
7. Mix soy sauce and water and pour into the well of flour. Stir with a fork until the dough rolls away from the sides of the bowl.
8. Knead dough on lightly floured surface for 30 seconds.
9. Divide dough into 8 pieces (we made 7). Roll into an 8" circle.
10. Spoon generous amount (3/4 cup) of filling into center. (You'll have extra leftover. You can set these out at the table if anyone wants extra.)
11. Moisten edges with egg-water mixture. Fold dough over into half-moon shape. Pinch and flute edges.
12. Transfer empanadas onto ungreased cookie sheets on baking pans.
13. Prick tops with fork multiple times and brush with egg-water mixture.
14. Bake 25-30 minutes until golden brown. Let cool before serving.

Monday, August 24, 2009

Tapas Restaurant and Nightclub


Tapas Restaurant and Nightclub 3/5
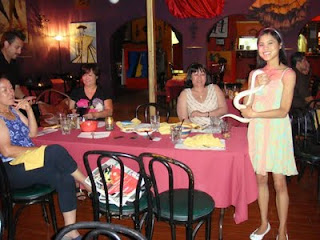
Anything wrapped in dough and fried is delicious. I had my first empanada for the first time at Tapas Restaurant and Nightclub. My aunts took me and my sister there for one of my aunts' birthday. That night, there was entertainment from the belly-dancing group The Jewels that Raq. Admission to see the show is $10 a person, which doesn't include dinner. Darn. :P

The belly-dancing was interesting. A little strange and exotic, but enjoyable. They even danced with snakes, which they let us play with after the show. We talked with one of the dancers and she was very nice. It was also fun when they pulled up people from the audience to dance. One funny thing I noticed was that more women than men were smiling while watching the show. My family joked that it was because the guys didn't want to upset their significant others by showing interest in belly-dancing women. Haha. :D


I forgot to take a picture of the food, but the dim lighting wouldn't have gotten very good shots anyways. What we ordered was:
  • Antipasto Madrid: Combination with Tortilla Espanola, Sauteed Mushrooms, Crab Crouquettes, Chorizo, Empanada de Pollo and Albondigas $16.50
  • Roasted Piquillo Peppers: Marinated and served with Fresh Garlic $6
  • Chicken Marsala: Tender chicken breast topped with a Marsala Mushroom Wine Sauce, served with Bomba and Vegetables $15
  • Stuffed Chicken Breast: Chicken breast stuffed with jamon serrano, spinach and cheese, served with Bomba and Vegetables $19
The appetizer platter was delicious. It comes served on a bed of lettuce. We split up each item so each of us could try some. Everything was really tasty. I would order this for my meal if I ever came back (which I don't think I would...). My order, the roasted pepper was not that great. I chose red snapper for the filling, and it was only all right. Cream sauce good, but the texture of a roasted pepper is not that delectable. The two chicken plates were good, but my aunt and I thought they were a bit too salty. I could get better marsala and stuffed chicken elsewhere for cheaper. But, it is a Spanish restaurant trying to do Italian for those two chicken dishes. I bet if we ordered other real Spanish stuff, it would have been better.

Decent entertainment, decent decor, and decent food. This place gets a 3 out of 5.


Other than that, I love the look and taste of empanadas, so I made some with my friends at a baking party I had two weeks ago.
We made healthy vegetable empanadas. I'll post that up tomorrow!

Thursday, August 13, 2009

Black Cherry Muffins

On the same day that I made my banana bread, I made cherry muffins so I could use the oven at one time. We had some dark cherries from a few sales at the supermarket, and my mom forgot that we had them. I took them out and decided to remake the fresh cherry muffins I had at Souplantation!

I used the Black Cherry Sour Cream Muffins recipe from Baking Bites. As I never have sour cream, I used vanilla yogurt instead. And I used whole milk instead of cherry juice. Whole milk really adds flavor to all these baked goods. Even though I did not glaze the top with an egg wash or milk, they came out shiny and moist. My sister asked if I did, and I said, "No, they just came out like that." I think it has to do with the yogurt and milk giving it a nice sheen. Pitting and chopping the dark cherries covered my hand in a dark red juice. This stuff really stains! But it was well worth it.


The first bite, I thought they were bland, but as you let the taste come out, it is a really good muffin. Not too sweet, just right. Perfect for a light breakfast or after-meal snack. The warm cherries are great too. I bet a little white icing drizzled lightly on top would be a tasty and pretty addition.