Showing posts with label quick. Show all posts

Monday, January 20, 2014

Quick Dan Dan Noodles

Dan dan turkey noodles

I always wanted to try dan dan noodles, but I've never gone to a restaurant to try them before. I heard about them by reading food blogs online, and it seemed simple yet satisfying. After forgetting about it so many times, I finally had the means and the memory to make it!

I looked up a recipe as a guideline and then started cooking with what I had on hand and to my preferences. Instead of traditional ground pork, I used ground turkey, which is generally heralded as healthier than pork or beef. I try not to eat a lot of pork anymore, in part because I do not eat that much meat anymore and because my mom decided one day pork was bad for us and decided not to cook it anymore at home. I also do not eat or buy beef very much because of the low amount of meat I just normally eat, and because I don't really know how to cook chunks of beef.

I doubled the recipe, but added much less soy sauce and other salty sauces than called for because I do not like things to be too salty. Despite this, the sauce came out still very salty and I will remember to lightly dress my noodles and meat with the sauce. I did not have sesame paste, but I did have leftover toasted sesame seeds from yesterday's sushi prep, so I threw those into my coffee/spice grinder, along with 4 garlic cloves, and a 1/2" knob of peeled ginger. I ground this into a chunky paste for the dan dan sauce, in place of the recipe's sesame paste. I also did not have hot chili oil nor Sichuan peppercorns, but I have an awesome Vietnamese substitue: Huy Fong chili garlic sauce! You should have this in you kitchen. I like it even better than Sriracha for cooking.
I tossed a huge glob of this into the sauce and DANNGGG was the sauce spicy. I can't ever imagine eating true Szechuan/Sichuan food. I think my tongue would light on fire and I'd die on internal burning.

So, if you don't have typical Chinese ingredients at home, but have access to soy sauce, vinegar, chili garlic sauce, fresh vegetables, sesame oil, sesame seeds, and Chinese wheat noodles, it is very easy to make a Dan Dan-like noodle dish at home in nearly 30 minutes!!!


Pauline's Easy Dan Dan-like Noodles (Serves 3-4)
Meat Ingredients
1/2 lb (8 oz) ground turkey
1 Tbs grapeseed or olive oil
2 Tbs soy sauce
1 Tbs vinegar
1 tsp Chinese five spice powder
Black pepper to taste
(I added some chopped kale leaves too. Yay vegetables!)
 
Sauce Ingredients
4 garlic cloves, coarsely chopped
2-ish Tbs sesame seeds (toasted, optional)
1/2" knob of ginger, peeled, coarsely chopped
1 cup of water (I accidentally added 2)
3-4 Tbs soy sauce
2 Tbs vinegar
2 tsp white sugar
3-5 Tbs of Huy Fong chili garlic sauce (to your spicy desire)

8 oz (3-4 servings) dry Chinese wheat noodles
Other veggies (I used alfafa sprouts and thinly sliced carrots, but you can throw in spinach, green onions, bok choy, or none at all, but veggies are so good for you!)

Directions
1. Prepare the meat topping: Heat a large skillet on medium-high heat. Add 1 Tbs of oil, then toss in the meat and cook, chopping into small pieces. As it starts to turn brown, add the kale (optional), soy sauce, vinegar, Chinese five-spice powder, and black pepper. Continue stirring over medium heat until the meat and kale are fully cooked. Remove from the pan and set aside.
2. Prepare the sauce: Puree the garlic cloves, sesame seeds, and ginger in a food processor (or spice grinder) until you get as minimally chunky paste as you can. Meanwhile, heat 2 cups of water in the skillet from step 1. When it gets warm, throw in the paste and stir to distribute throughout the water. Add soy sauce, vinegar, sugar, and chili garlic sauce. Taste and adjust accordingly. Let cook, stirring, for about 5 minutes.
3. Boil the noodles according to package directions, adding vegetables in the last minute. Drain.
4. To assemble: Place noodles with vegetables in a bowl. Top with meat, then drizzle a ladle of the sauce on top, about 1/2 to 1 full lade is good, depending on how salty/spicy you want it and how much you are eating. Garnish with green onions or more sesame seeds, if desired. Enjoy!

Saturday, May 4, 2013

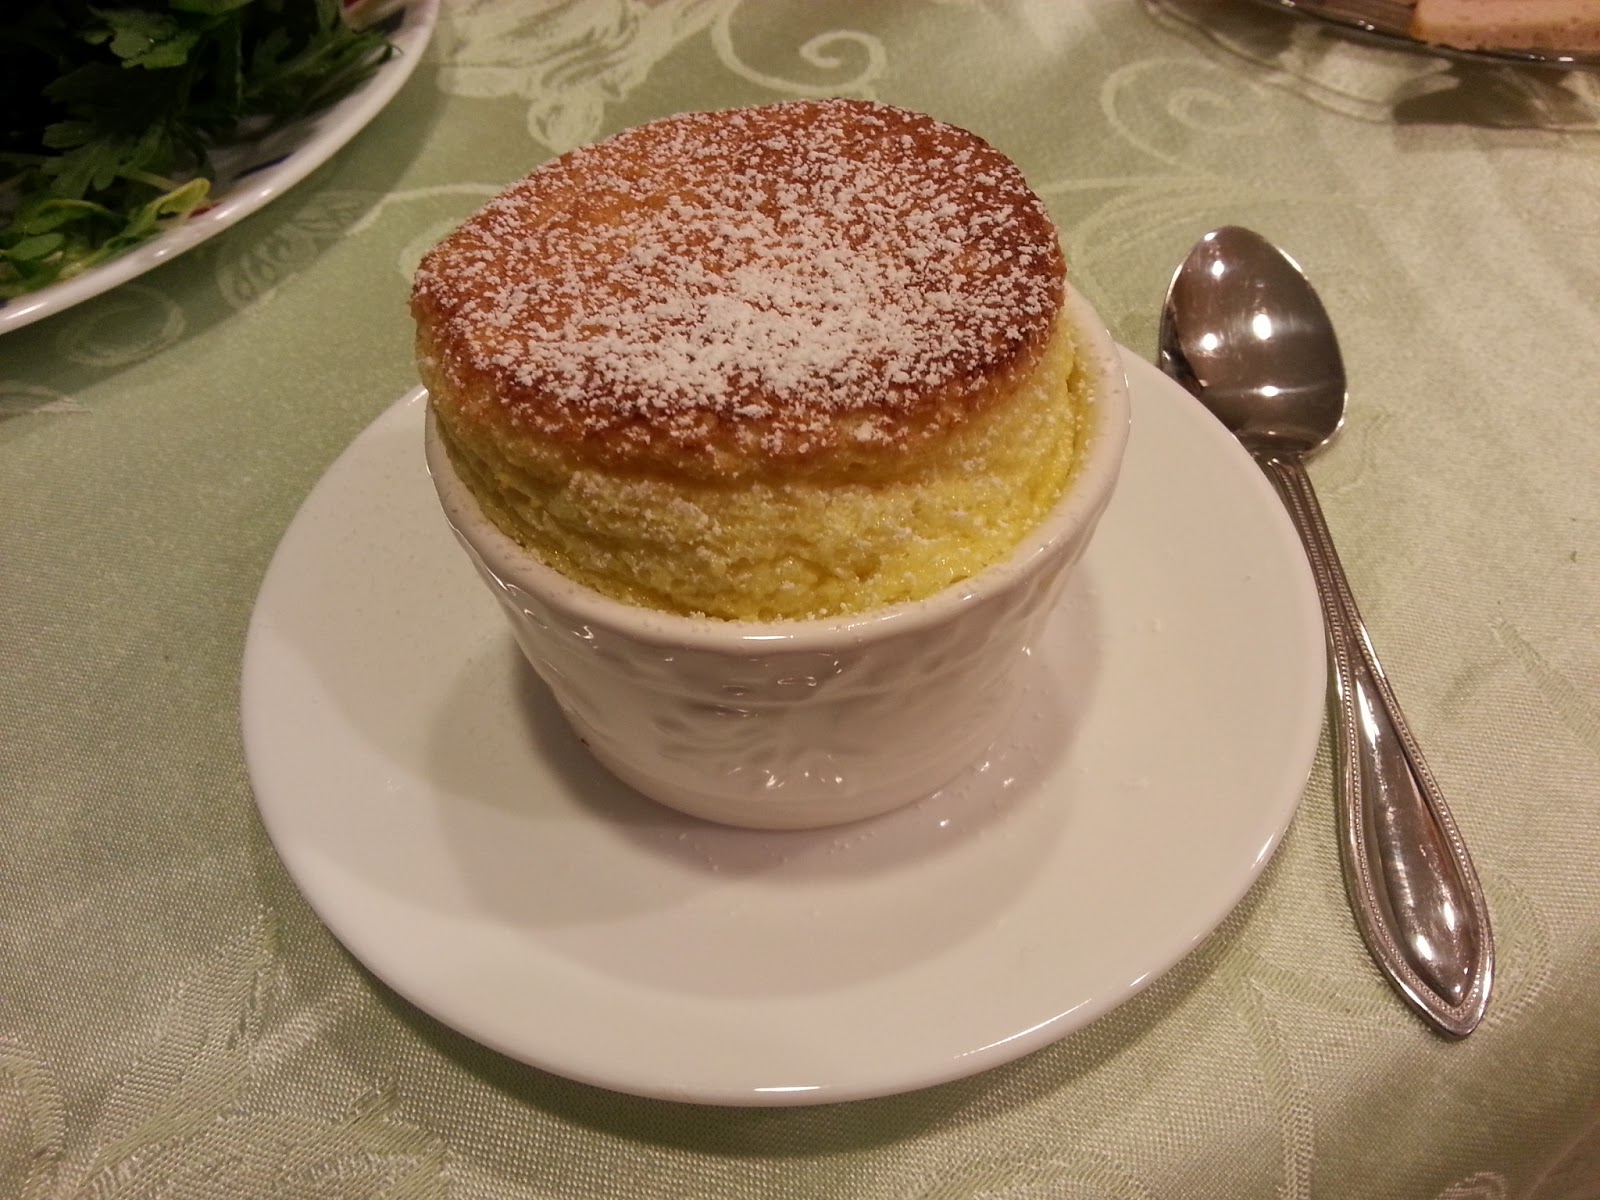
Vanilla Souffles

 
Souffle. 

You hear the word and the image of a delicate dessert set in a cute French bakery on a light Spring day crosses your mind. After the pleasant image plays to the end of its reel, another takes it place. Cartoon characters rush into a kitchen just as you pull the souffle from the oven, excited to see its risen cylindrical golden top.

Boom! Clatter!

The characters crash into pots and pans and yell in surprise.

The souffle exhales a big fat POOT! and crumples into itself. The expression on your face is that of priceless horror and sadness.

Oh, souffle, oh souffle.

You put the ramekins down and chase those cartoon characters into the horizon as cartoon-y music plays in the background. Th-th-th-that's all folks!

...

Is that what you imagine when you hear about souffles and thinking about making them? There may be a misconception that souffles are hard to make and that they deflate if there is a large sound. Quite the contrary. Souffles are very simple to make and the deflation is a matter of time not audio agitation. Because souffles deflate so quickly, they must be served right away and I think this contributes to its perception as a difficult dessert to make. It is only difficult because it must be made and served at the right time.

As an aspiring baker, I believe you have to make a souffle at least once. It's like a requirement to call yourself a baker. Muffins, brownies, cookies. Yeah, yeah, we can all make those. But when I imagine a true European baker, I imagine the careful creation of decorated cakes, tartlets, croissants, and souffles. My goals to becoming a better baker include making these items at least once in my life, and eventually coming back to perfect them.

You have already seen the labor-intensive devil's food chocolate cake that I made for my sister's graduation. (which I realize I never posted about. Whoops. Typical me. And I can't find all my photos from my sister's graduation...there were so many good pictures T_T ... That cake was so awesome and I put so much work into it)


I made a healthy fruit tart that was tasty enough but could use some work with the crust.


And I made whole wheat croissants before that took so much butter and so much rolling. The whole wheat croissants were tasty (despite a little more time spent in the oven than I had wanted) but it is definitely something you have to have a lot of free time and energy for. (Again, I cannot find the pictures. And I totally thought I had posted about them or at least the pictures before, but I went through all my posts and see nothing! Oh sadness)

My grandma would agree; she recently made croissants too and said she would probably not try and make them again. Costco croissants are fine and dandy, thank you very much.


I decided to make a classic vanilla souffle. My decision was prompted by this new YouTube baker I randomly found one day. Eugenie Kitchen is such a pristine cooking blog and series of cooking videos. Eugenie is this adorable Korean lady who talks eloquently, speaks French, and teaches each recipe through straightforward, well-explained steps. She even has every ingredient placed in such cute bowls and plates. I watched her video for vanilla souffle and was impressed by how easy it seemed. When I came home for winter break, I was excited to try it because my sister bought ramekins (she had bought them to make creme brulee, but I don't think that has happened yet).


  I followed her recipe to the dot and my 4 ramekins full of souffle came out so perfect and amazing! With a light dusting of powdered sugar, they were the perfect degree of sweetness. It was like an eggy, airy pancake. It was still warm inside. You pierce the top with a spoon and then it sinks through the moist spongy interior. You put it in your mouth and the flavor of vanilla and custard hits your tastebuds while the warmth enhances the experiences.


Souffles are such an awesome dessert. I would like to make them more often, but it is sad they only last around 10 minutes. They start deflating around 5 minutes, so you really have to eat them fast. Even after deflating, they are still edible and still have the same flavor, just not all of the awesome flavor of fresh.


I would highly recommend trying out this recipe at least once in your baking career. It is little effort with big reward.

For the recipe, hop on over to Eugenie Kitchen!

Monday, January 28, 2013

Recipe: Raisin Oat Scones

Continuing from my "Catching Up" post, where I put images and brief descriptions of my recent cooking and baking experiments...

Raisin Oat Scones- Sept 29, 2012


I love scones. Not the crazy sweet ones you get from grocery stores or chain coffee stores. I like homemade or artisan bakery scones, where the emphasis is on the good butter or cream and the simple combination of flavors. I love to see oats or seeds top my scones instead of icing. I believe, as a breakfast food, it need not have icing.


These are healthy scones made with oats, whole wheat flour, flaxseed, and raisins. These rose gorgeously in the oven. Coming straight from the oven, they are warm and tasty and delicious. A couple days later, they get dry, but that's why they are wonderful accompanied by tea!


I made about 8 wedges, which came out very large. You can see how big they look! It is not a trick of the camera. They are actually that huge! Like Starbucks or Panera Bread huge, but not overly sweet that you feel comatose after eating one. They are satisfying, wholesome, and sweet enough, especially great with some vanilla almond milk.

Unfortunately, I did not write where I got this recipe from. I just wrote "Blueberry Oat Scones" in my recipe booklet and forgot to write the site. So, if this is your recipe, please call me out so I can cite you! Thanks! As you can tell, I used raisins instead of blueberries, because that's what I had on hand.

Raisin Oat Scones (8 servings)
Ingredients
1 cup whole wheat flour
1/2 cup oats, ground
2-1/4 tsp baking powder
1/4 tsp baking soda
1/2 tsp salt
6 Tbs cold butter, cubed
2 Tbs maple syrup (I used honey)
1 egg, separated
1/4 cup buttermilk (or 1/4 cup milk soured with 1 tsp fresh lemon juice)
1/2 cup raisins (or blueberries or cranberries or dried apricots...)
1 Tbs flour
1 Tbs lemon zest (I didn't use this)
1 Tbs water
(I added some brown flaxseed for texture)

Directions
1. Mix flour, oats, baking powder, baking soda, and salt (and flaxseed). Cut in butter until the mixture resembles coarse crumbs.
2. In a small bowl, beat the egg white, syrup/honey, and buttermilk. Make a well in the center of the dry mixture and pour the wet mixture in. Stir to combine.
3. Toss the dried or fresh blueberries with the 1 Tbs flour and lemon zest. Fold into the batter.
4. Pat the dough out into a circle on a floured surface. Cut into 8 triangles.
5. Preheat oven to 425 deg F. Lightly grease a baking sheet or line with parchment paper. Place the triangles 1-2" apart.
6. Lightly beat the egg yolk and 1 Tbs water. Brush over scones. Sprinkle with oats (and flaxseed).
7. Bake int he oven for 15-18 minutes till golden.
8. Cool on a wire rack. Eat slightly warm, fresh from the oven for yumminess!

Notes:
1. The egg yolk wash gives it that nice golden color and sheen. Love it!
2. The texture and taste of this scone is more for the health-appreciating. It still is sweet, but just enough to satisfy. If you like sweeter scones, feel free to drizzle with icing or add more syrup/honey.
3. To up the creaminess or moistness next time, I my add another Tbs of syrup/honey or up the buttermilk just a tad (maybe from 1/4 cup to 1/3 cup).

--------------------------------------------------------------------
The next scone recipe I want to try is this pumpkin "farl", or a slim scone originally made of butter, flour, and mashed potato and cooked on a skillet. I snapped a photo of the recipe from this cookbook on display at the local Pecan Farm.


Next recipe: Mushroom Mataar


Monday, June 18, 2012

Peanut Soba Noodles

The beginning of my senior year at UC Berkeley, I "sat in" (audited) on the Vietnamese language class taught by the extremely nice Tay (teacher/professor) Bach. I have sit in on this class several times throughout my 4 years of undergraduate study at Berkeley, but have always faded away as the time went on. As each semester wore on, I would feel too busy with classwork, research, and other various things (cough, laziness) and would stop going to class. Whenever I did go, it was fun and enjoyable. Fun to learn the cute little Vietnamese songs that kids would sing; fun to learn how to write. But because I stopped going, I have lost my ability to write and speak. Nowadays, I speak very basic Vietnamese phrases to my family but it is at a very elementary level. I hope to get better, but it takes a lot of practice and effort to grasp a language once you pass that young critical age.

This post is related to a dish I made for a beginning-of-the-year potluck we had last fall. I knew most people would bring simple and quick food items to the event, as is typical of time-pressed (and maybe a bit lazy) college students. As a personal effort, I usually try to bring something that acts as a main dish and with vegetables. For this potluck, I wanted something fast yet tasty to make. I searched for peanut soba noodle recipes and used one of the many recipes out there to act as the base of my soba dish.


Generally, you mix some peanut butter, rice vinegar, soy sauce, and either chili garlic sauce or Sriracha (chili garlic sauce is more salty, spicy and garlicky, whereas Sriracha adds a mild and sweet spiciness) to create the sauce base. You boil the soba noodles and then mix it with the sauce. Chop some fresh onions (cilantro would be nice too) and sprinkle them and sesame seeds on top. (To get the basic proportions right, you can try this recipe and adjust as you feel necessary.) A little sesame oil added to the peanut butter mixture is a small addition that enhances the flavor profile.

This is a really quick recipe that has good carbs from the buckwheat noodles, some green from the green onions, and protein from the peanut butter (even better if you get the all natural, no salt, no oil kind). Every one who tasted the noodles at the potluck couldn't help but approach me later and say how good the noodles were. Given, the only comparisons were just chips and dips and some takeout dumplings, but I'll take the praise where I can get it. *wink*

Enjoy and hope you all are enjoying your summer as I am now.

Monday, December 5, 2011

Baking Donuts in the Throes of Dead Week

It is really hard to believe that I am an undergraduate senior at UC Berkeley and that I am coming to the end of my second to last semester here. "Rest, Recitation, and Review" Week (or more commonly and endearingly referred to by faculty and students as "Dead Week") has just begun and it is going to be hectic. Two group projects/presentations due on Wednesday and Friday this week, so I'm meeting with my groups nearly every day (but today, thank goodness!). Review sessions and mandatory attendance of presentations occur during the same time as my normal class periods, so it's not like classes ended last Friday, as it officially says in the Academic Calendar. Not to mention I have about 5 late shifts this week. This is going to be very intense, but somehow I'll survive.

Berkeley engineering students in the library the day before Dead week

And then sometime find time to write my graduate applications to three more universities and a scholarship app before December 15.

FML.

Anyways, you've all come here to read about my baking, not my personal life. I mean, that's why we browse food blogs right? The person behind the screen does not matter. Only their food and their ability to take photos of their food matter. Therefore, I will digress no longer.

Gingerbread Donuts.

I've been having this unrelenting craving for gingerbread man cookies since Thanksgiving. I bought the Lebkuchen from World Market, made pear upside-down gingerbread cake (from Eatingwell.com, to be documented soon!), and bought iced gingerbread cookie bites from a nearby bakery...Yet nothing has satisfied my craving for a real, full-on gingerbread man cookie.

So I made gingerbread donuts, and am still craving gingerbread men. Oh, the woes of woman, to crave food and men in the same moment. Browsing through Tastespotting, I that livelovepasta posted this wonderfully healthy and tasty recipe for gingerbread donuts and immediately bookmarked it. (She apparently got it from PinchofYum, Sunday morning, I got up and made a batch to bring to my project group (unfortunately didn't have time to ice them before bringing them. So much better iced!)


I modified her recipe because of the spices I had on hand, and I wanted to try the lemon and gingerbread combo I've seen floating around. Berkeley is bountiful with random lemon trees in front of everyone's apartments and houses. It's so great, walking home, reaching into someone's tree, plucking a fresh and plump lemon, and then taking it home. ;-P

Gingerbread Donuts with Lemon "Spicing" (modified from livelovepasta)
For the Batter:
1 cup flour
¾ teaspoon baking powder
¼ teaspoon baking soda
1 teaspoon cinnamon
½ teaspoon ginger
Sprinkling of allspice (can be somewhat generous)
Sprinkling of nutmeg (this is strong, don't be too generous)
¼ teaspoon salt
¼ cup (dark) brown sugar, divided
1 egg
¼ cup (unsweetened) applesauce
2 tablespoons maple syrup (I used breakfast syrup, darn maple syrup is expensive on a college budget)
2 Tablespoons milk
2 Tablespoons butter (melted in the microwave)
For the Glaze:
Powdered sugar, couple squeezes of fresh lemon, cinnamon and ginger, all to taste and texture

Directions
1. Mix flour, baking powder, baking soda, cinnamon, ginger, allspice, cloves, salt and ¼ cup brown sugar together in a medium bowl.
2. Melt butter in microwave. Mix the egg, applesauce, syrup, and milk in a large bowl. Pour in the butter and mix well. (keep the bowl the butter was in)
3. Pour in half the flour mixture to the liquid mixture. Stir to mix. Pour and fold in the rest of the flour mixture.
4. Preheat the oven to 350 degrees F.
5. Use a pastry brush and wipe off the butter from the butter bowl. Use this to grease the mini donut pan.
6. Put some of the batter into a plastic zip bag and cut a small bit of the bottom corner of the bag. Fill each tin ½ full with batter (or 3/4 full for super awesome plump donuts).
7. Bake for about 6-8 minutes. Remove the pan from the oven. Cool in the pan 5-10 min, then use a plastic knife and excavate the donuts from the pan carefully. Let cool completely on wire racks.
8. Mix the glaze ingredients together, making sure it's not too liquidy, but not too hard to stir. Push donut tops in, twist about to coat, pull up. Use a chopstick or plastic knife to smooth out the glaze and to remove extra glaze.
9. Let the glaze harden, set out on a nice plate and ENJOY!!!

(Calorie content should be around 100 if you make around 20 donuts, around 150 if you make 12, and around 50-80 if you make around 24 donuts)


Verdict?

You won't wanna share these little treats. Hot dayum, these tasted really good. I was sad to share them with my roommates and friends, to tell the truth. Really yummy. The donuts by themselves are a little dry tasting on their own (unlike the vanilla and hint-of-nutmeg donuts from VeganYumYum), but taste really good with the lemon frosting.

Definitely gonna make these again when I have time. Oh, 4 weeks of winter break, come now!

Hope you enjoyed this latest update on my Donut Project (and my life, lol). Hope to see you all soon! Wish me luck to survive through Dead Week and Finals!

Saturday, October 15, 2011

Baked Donut Update

For lack of posting, you must forgive me.

I am a college student, a senior in bioengineering at UC Berkeley, and juggling projects, clubs, assignments, and some tests here and there. I do have a legitimate excuse for not posting as much.

It's called PFAT: procrastination, Facebook, ADD, and Tastespotting (okay, so the ADD part isn't really real, but I have such issues focusing sometimes).

Zits really tells you how us college teenagers (wait, I'm no loner a teen, dangit!) work (please click the images below to read):


Another funny Zits comic about blogging:

Well, besides this detour, the purpose of this post is really an update on my semester Baked Donut Project. So far, I've made about 5 different types of donuts (1 of which failed and we will not post pictures of the lava flow it produced on my pan x_x ): basic vanilla from NorPro (the baking pan I bought), vanilla-nutmeg from VeganYumYum, dark chocolate coffee bean, failed eggless carrot cake, and pumpkin.

For now, I will only post my first two trials so that people with slow to average internet connections don't suffer from the load times.

Norpro Vanilla Cake Donut Recipe: came out flat and more cookie like
(harder and crispier than cakey). Simple frosting with pastel sprinkles.
Try 2: VeganYumYum's Vanilla-Nutmeg Donuts. Very very awesome and delicious.
The nutmeg added a very pleasant flavor, while the texture was perfect.
Even the day after and after it was still delicious.

Cakey interior texture, springy under strain (omg, viscoelastic!).
Have to admit, the sprinkles are pretty, but I don't like how much
crystalline crunch it gives to the top. I want normal sprinkles.

I modified VeganYumYum's by making it non-vegan and using unsalted real butter, milk, and eggs. Instead of apple cider vinegar, I used fresh lime/lemon juice. For the frosting on both, I mixed powdered (confectioners') sugar with a touch of milk, lemon, and vanilla. To frost, you just dip the donuts upside in it, let some drip down and wipe some off, smooth it a little, then dip the frosted top into a small flat bowl of sprinkles, making sure to roll along the sides.

Because Norpro's failed me in terms of shape and texture (flavor was good), I will not post their recipe. Above are links to VeganYumYum's recipe, so you can go there to experiment with hers. It is a great recipe base, which I modified with the aforementioned dark chocolate coffee bean, which will be posted up next soon sometime...

-------

Note to self: try the recipes on this page

Sunday, September 20, 2009

A lot of Things I've Made

So, I've done a lot of cooking since the last post. What with school starting and all, there's been less time to post. I took pictures of the food and planned on blogging about them, but then a day would pass and then suddenly it'd be a week since I'd made that dish! Here's a listing of what I've done in the past couple of weeks:

Sesame Fish Sticks

 
Paprika Pepper Salmon

Cilantro Pesto Pasta (with Pork Fu and Lettuce)

I've done a couple of other random things, but didn't take a picture. I also made Sauteed Vegetables and Turkey in Bechamel Sauce, and today I made French Onion Soup. It's been fun trying out new recipes and experimenting at will with whatever ingredients I have on hand. I don't really have exact measurements for any of my recipes, but here is the basic ingredients for the Salmon and Pesto. To make them is fairly quick and simple - contrary to making the fish sticks, which required deep-frying. I put them in a low-rim pan and hot oil was spraying all over me! It was not fun, and I was in a rush to take it to my friend's Disney Movie Marathon. But, people liked it, so I guess it was worth it.

Paprika Pepper Salmon:
Salmon, Paprika, Pepper, Onions, Garlic
Pan-fry in olive oil until cooked through.

Cilantro Pesto:
1/4 cup Almonds, Bunch Cilantro Leaves, 3 Garlic Cloves, Enough olive Oil to desired consistency, Salt + pepper (to taste)
Blend in a food processor.